

How to Install Your eSIM
.png)
Before You Install Your eSIM
Please check three things:
1. Your phone supports eSIM.
Most newer iPhones, Samsung Galaxy models, Google Pixel phones and many other modern smartphones support eSIM.
2. Your phone is network-unlocked.
A carrier-locked phone may not allow you to use a travel eSIM from another provider.
3. You have Wi-Fi or internet access during installation.
We recommend installing your eSIM before departure or while connected to Wi-Fi at your hotel or airport.
How to Install Your eSIM
In most cases, installation takes only a few minutes.
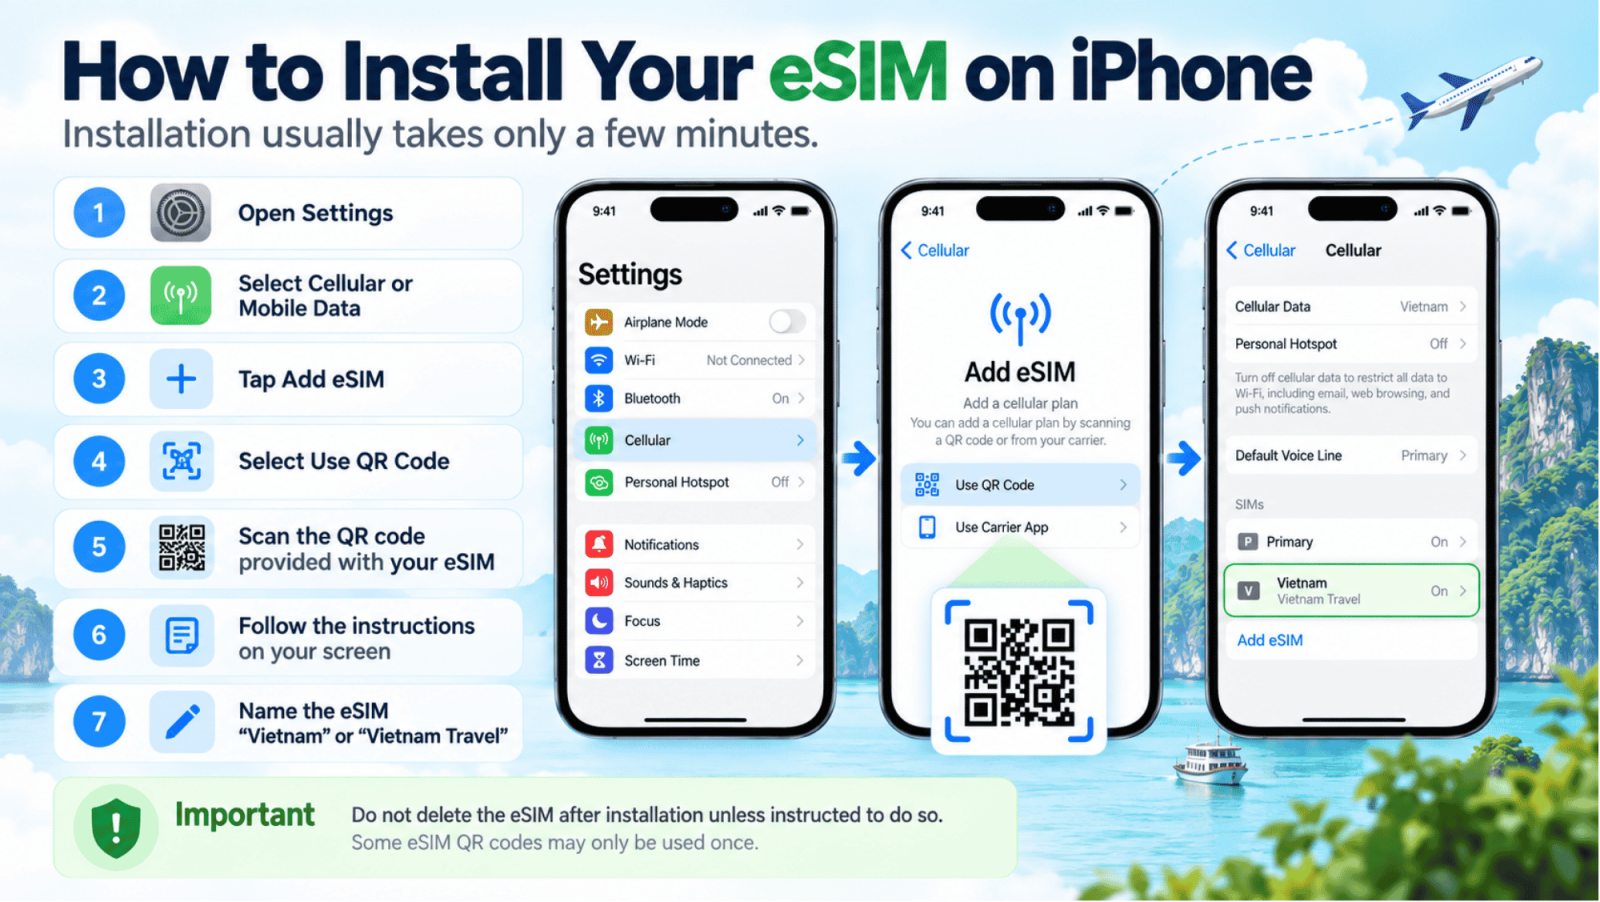
For iPhone
-
Open Settings.
-
Select Cellular or Mobile Data.
-
Tap Add eSIM.
-
Select Use QR Code.
-
Scan the QR code provided with your eSIM.
-
Follow the instructions on your screen.
-
Give the new eSIM a name such as Vietnam or Vietnam Travel.
Your eSIM is now installed.
Important: Do not delete the eSIM after installation unless instructed to do so. Some eSIM QR codes may only be used once.
For Samsung Galaxy
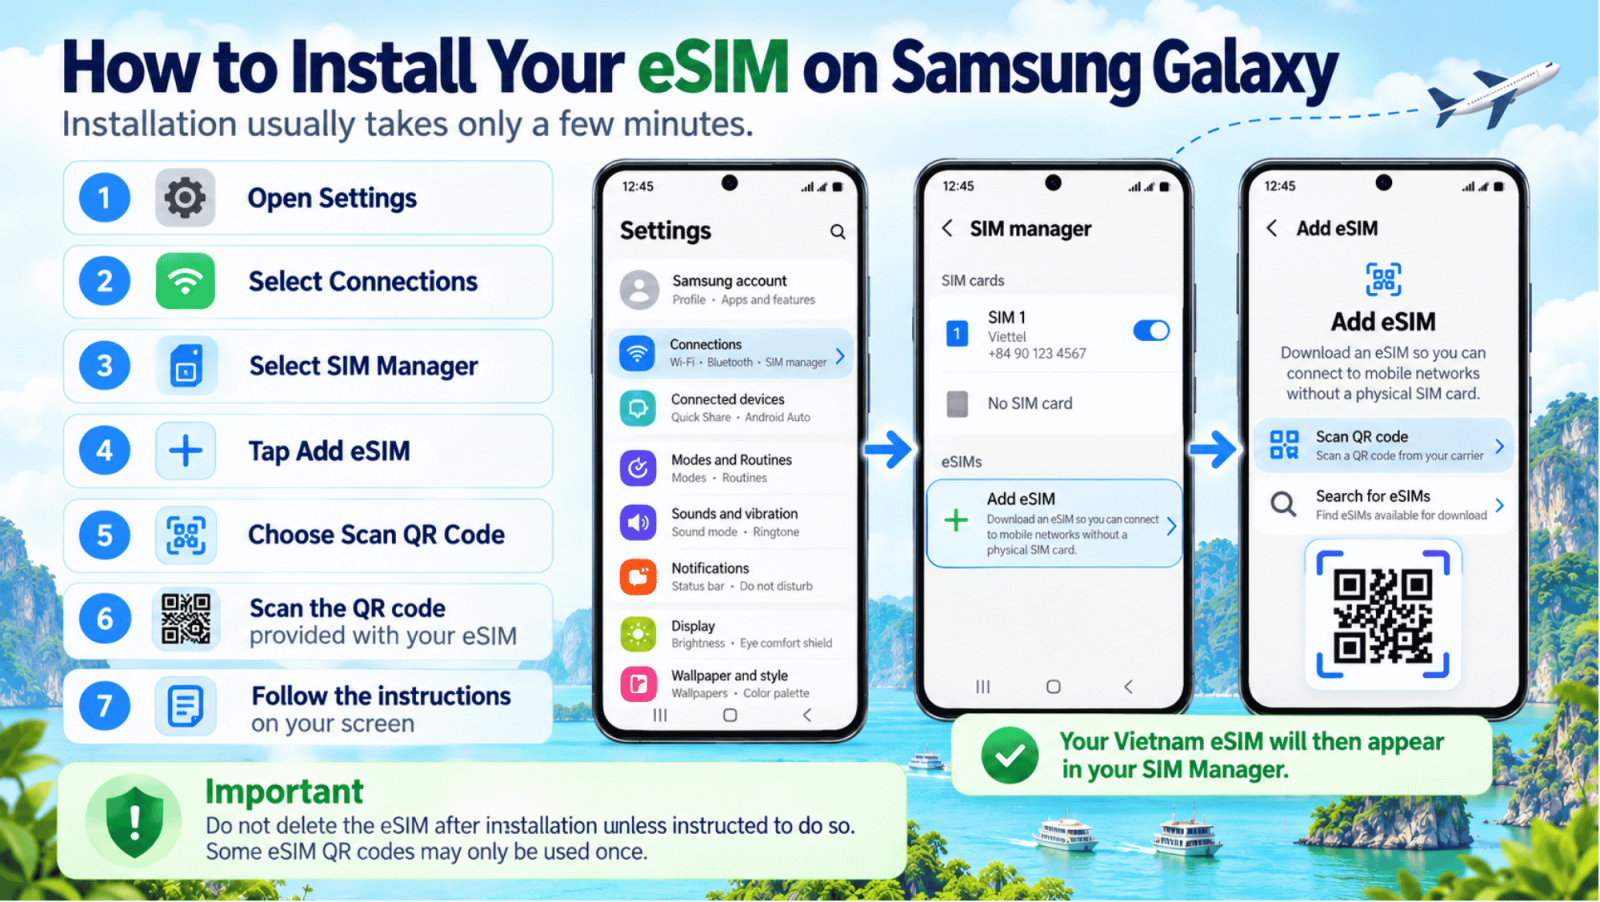
-
Open Settings.
-
Select Connections.
-
Select SIM Manager.
-
Tap Add eSIM.
-
Choose Scan QR Code.
-
Scan the QR code provided with your eSIM.
-
Follow the instructions on your screen.
Your Vietnam eSIM will then appear in your SIM Manager.
For Other Android Phones
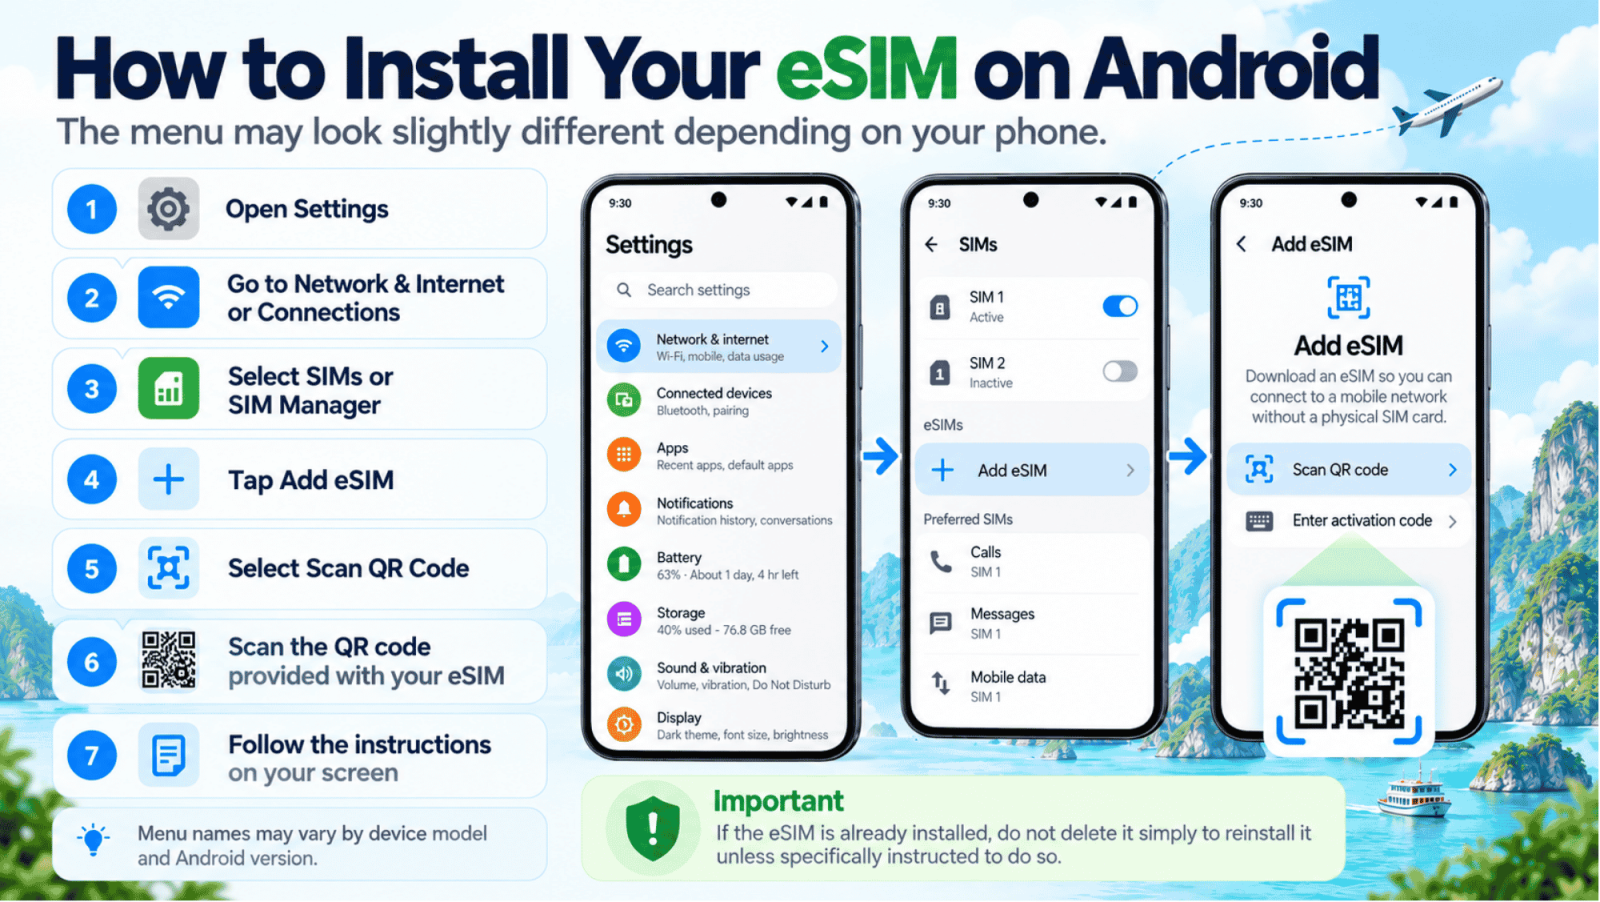
The menu may look slightly different depending on your phone.
Generally, go to:
Settings → Network & Internet / Connections → SIMs / SIM Manager → Add eSIM
Then scan your eSIM QR code and follow the instructions on your screen.
When You Arrive in Vietnam
Once you arrive, you normally only need to complete a few simple steps.
Step 1 — Turn on your Vietnam eSIM
Go to your phone's SIM or Mobile Data settings and make sure the new eSIM is switched ON.
Step 2 — Select the eSIM for Mobile Data
Choose your Vietnam eSIM as the SIM used for mobile data.
Step 3 — Check Data Roaming
Some travel eSIM plans require Data Roaming to be turned on.
If instructed by your eSIM provider, enable:
Settings → Mobile Data / Cellular → Vietnam eSIM → Data Roaming → ON
This applies only to the travel eSIM.
Step 4 — Wait for the network
Your phone should automatically connect to an available mobile network.
This may take a few moments.
Once you see 4G, LTE or 5G on your screen, you are connected.
A Useful Tip Before Leaving Home
Install your eSIM before your flight to Vietnam, but only start using the data plan according to its activation conditions.
That way, when you land in Vietnam, you will not need to search for a SIM shop or struggle with installation after a long flight.
Simply turn on your eSIM and continue your journey.
Keep Your Home SIM Without Unexpected Roaming Charges
If you keep your normal SIM active while travelling, check your home carrier's international roaming settings.
A simple setup is:
Home SIM: Calls/SMS if required
Vietnam eSIM: Mobile Data
To help avoid unexpected roaming charges, make sure mobile data roaming is not accidentally enabled on your home SIM.
Having Trouble Connecting?
Most connection issues can be solved quickly.
Try the following:
-
Make sure the Vietnam eSIM is switched on.
-
Make sure the eSIM is selected for mobile data.
-
Check whether Data Roaming needs to be enabled for the travel eSIM.
-
Turn Airplane Mode on for around 10 seconds, then turn it off.
-
Restart your phone.
-
Wait a few minutes for the phone to register on the local network.
If the eSIM is already installed, do not delete it simply to reinstall it unless you have been specifically instructed to do so.
Travel Vietnam. Stay Connected.
A great journey is easier when the small details are taken care of.
With an eSIM ready on your phone, you can step out of the airport and immediately focus on what matters — discovering Vietnam, finding your way, communicating easily and enjoying your journey.
Welcome to Vietnam.
HA Travel — Your Trusted Bridge to Vietnam & Asia.